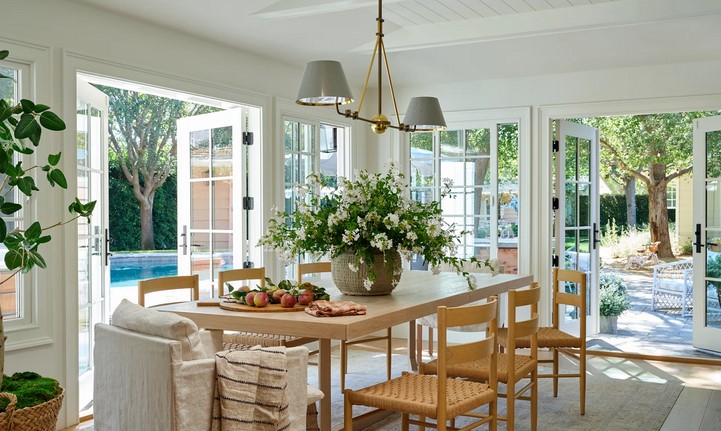
I once visited a client during a winter renovation in a classic 1920s brownstone. They had spent thousands of dollars restoring original oak floors and ornate crown molding, yet sitting directly beneath the living room window was an unsightly, chipped cast-iron radiator that looked like an abandoned factory fitting. To hide it, the previous owner had built a solid, boxy wooden cover over the entire unit, dropping the room’s ambient temperature by nearly eight degrees while causing their heating bills to skyrocket.
In my over ten years of hands-on home improvement work, I see this exact mistake repeated constantly. Homeowners view traditional radiators either as architectural eye-sores that must be completely boxed in, or as untouchable historical fixtures they just have to live with.
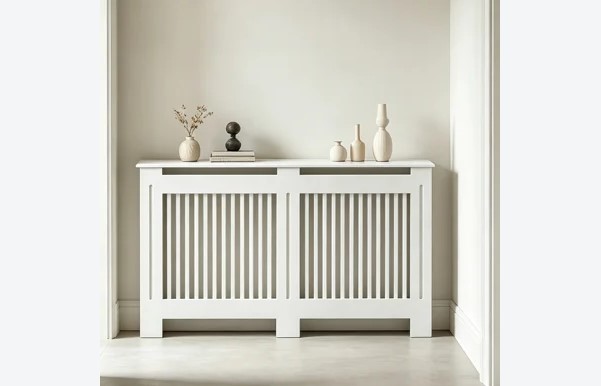
The truth is that you can transform these heavy cast-iron or modern panel units into sleek architectural highlights without sacrificing heating performance. The secret lies in pairing a well-ventilated enclosure with a high-performance radiator cover grill.
The Thermodynamics of Heating: How a Radiator Cover Grill Works
To understand why a custom enclosure succeeds or fails, you first need to understand how a radiator actually heats your living space. Despite their name, standard steam or hot-water radiators do not rely solely on thermal radiation; over 70% of their thermal output is delivered through natural air convection.
Think of your radiator like an atmospheric engine. Cold air rests low near the floor line, gets drawn beneath the warm radiator coils, heats up, expands, and rises toward the ceiling to create a continuous rolling loop of ambient warmth.
When you place a solid box over a radiator, you effectively choke that thermal engine. Installing a properly engineered radiator cover grill acts like adding a high-flow air intake to a performance engine—it maintains essential airflow velocity while disguising the heavy hardware behind a refined, decorative faceplate.
Material Selection and Perforation Ratios: Finding the Perfect Balance
The most crucial technical specification when choosing or custom-building a radiator cover grill is its open surface area, often called the perforation ratio. If your decorative screen pattern is too dense, warm air gets trapped inside the cabinet housing, leading to severe efficiency loss and uneven room heating.
| Material Type | Structural Durability | Thermal Conductivity | Recommended Open Area Ratio | Best Interior Application |
| Woven Brass / Steel Mesh | High | Excellent | 60% – 75% | Classic, vintage, or high-efficiency spaces |
| Perforated Sheet Aluminum | High | Good | 50% – 65% | Modern, minimalist, and mid-century designs |
| Laser-Cut MDF Panels | Moderate | Low (Thermal Insulator) | 45% – 55% | Budget-friendly, paintable traditional covers |
| Slatted Hardwood / Timber | High | Low | 50% – 60% | Rustic, Scandinavian, and coastal interiors |
The 50% Open-Area Rule
As a baseline rule of thumb, always select a radiator cover grill pattern that provides a minimum of 50% open surface area. Patterns like cloverleaf, geometric lattice, or expanded metal mesh allow convective air currents to pass freely into the room without restriction, preserving up to 95% of your unit’s baseline BTU heat output.
Structural Layout: Engineering Convection and Heat Deflection
A beautiful radiator cover grill on the front panel is only one piece of the performance puzzle. Maximizing thermal transfer requires optimizing cabinet geometry to guide rising hot air outward into your living space.
-
Bottom Gap Clearance (Cold Air Intake): Ensure the bottom of the cabinet frame sits at least 2 to 3 inches above the floor line. This wide gap allows heavy cold air to flow smoothly underneath the radiator coils without creating air drag.
-
Top Air Release Vents: Never seal the top of a cabinet completely flat. Incorporate a full-length rear slot or a top-facing slotted radiator cover grill section to let rising heat escape effortlessly.
-
Internal Radiator Reflectors: Line the interior rear wall behind the radiator with foil-faced insulation panels. This reflects infrared radiant heat forward through the front grill instead of letting it soak uselessly into exterior brick or drywall.
Expert Advice: Pro Tips and Hidden Warnings from a 10-Year Pro
Over a decade spent troubleshooting HVAC and interior woodwork layouts yields practical insights that product manuals omit:
Pro Tip: The Curved Aluminum Baffle TrickWhen building or installing a custom cabinet, mount a sheet of curved aluminum or galvanized steel inside the top rear corner of the box. This smooth, 45-degree angled baffle acts as an air scoop, gently redirecting rising hot air forward through the front radiator cover grill instead of trapping it under a flat wooden top shelf.
-
Hidden Warning #1: The Trapped TRV (Thermostatic Radiator Valve)If your radiator features a Thermostatic Radiator Valve (TRV), housing it inside a tight cabinet will cause it to read false ambient temperatures. The valve detects trapped warm air inside the box and shuts off heat delivery prematurely before the rest of the room warms up. Always extend the TRV sensor outside the cabinet frame or switch to a remote wall sensor.
-
Hidden Warning #2: Paint Selection and Off-Gassing HazardsNever coat a custom wood or metal radiator cover grill with standard interior latex paint. Under high heat operating cycles, cheap paints can crack, turn yellow, and emit foul chemical VOC odors. Always use high-temperature enamel, powder coating, or heat-resistant wood finishes designed for thermal applications.
Step-by-Step Installation and Sizing Protocol
To ensure your new cover delivers both high aesthetics and maximum thermal efficiency, follow this straightforward sizing and setup protocol:
-
Measure Beyond the Cast Iron: Measure the maximum height, width, and depth of your radiator unit, including all side valves, pipe fittings, and bleed valves.
-
Add Thermal Clearance: Add a minimum of 2 inches of clearance to the top and front, and 3 inches to each side to allow adequate internal air circulation.
-
Inspect the Front Screen: Verify that your chosen radiator cover grill pattern is securely anchored to the main frame using heat-resistant mechanical fasteners or metal clips rather than standard hot glue.
-
Install Quick-Release Wall Anchors: Always anchor the main cabinet structure directly to wall studs using quick-release brackets. This lets you remove the unit easily for annual radiator bleeding and seasonal dust cleaning.
Elevate Your Home’s Thermal Style
Upgrading your home’s heating system does not mean choosing between ugly functional hardware and a freezing room. By selecting a high-flow radiator cover grill, engineering proper airflow clearance, and adding simple heat deflectors, you turn a clunky utility asset into an elegant architectural feature that keeps your family warm all winter long.
What kind of heating setup do you have in your home right now? Are you dealing with dated cast-iron radiators, or are you planning a custom cabinet build for your living space? Share your thoughts or ask a question in the comments below—I would love to help you plan your next home improvement project!