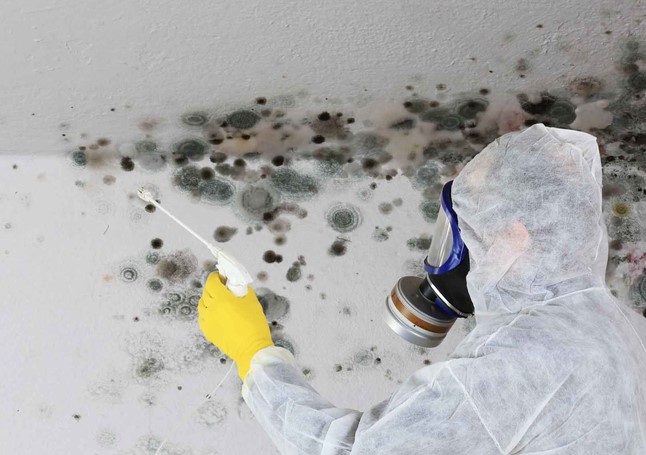
I once walked into a gorgeous $1.2 million suburban home where the owner had spent three weeks painting over a dark, fuzzy patch in her master suite closet. She assumed a quick coat of primer would fix the eyesore. By the time I cut open the drywall, we uncovered over 80 square feet of thriving, jet-black colony creeping behind the insulation, fueled by a pinhole leak in an upper supply line.
What started as a $50 aesthetic touch-up quickly spiraled into a multi-thousand-dollar structural remediation project.
In my over ten years of hands-on home improvement and building science experience, I see this exact mistake every single month. Homeowners view indoor fungi as a minor cosmetic annoyance rather than a active structural hazard. If you want to protect your property’s value and indoor air quality, you need a disciplined, engineered approach—a complete Mold Removal Guide rooted in building science.
The Biology of Contamination: Why Mold Is an Environmental Enemy
To understand why simple surface wiping fails, think of a fungal colony like a dandelions growing in your yard. The fuzzy dark spot you see on your sheetrock is merely the yellow flower above ground. Beneath the surface, invisible root-like structures called hyphae anchor deep into porous building materials like wood and drywall paper.
When you scrub the surface with water or household cleaners, you merely snap off the flower. The living roots stay intact inside the substrate, releasing billions of invisible airborne seed-like micro-particles known as mycotoxins and spores throughout your home’s HVAC system.
SURFACE WIPING (Fails)              COMPLETE REMEDIATION (Succeeds)
   \   /                             \   /
  [ Visible Mold ]                  [ Cut Out Drywall ]
=======||======= Drywall Surface    =======||======= Drywall Surface
       ||  <-- Hyphae Roots stay!          ||  <-- Structural Removal
     //////                              //////    + HEPA Filtration
Technical Assessment: Remediation Protocols and Equipment Specs
Executing a safe cleanup requires understanding the scale of contamination and using commercial-grade containment gear.
| Contamination Scale | Contaminated Area | Containment Protocol | Recommended Equipment |
| Level 1 (Small) | Under 10 sq ft | Spot containment; localized personal gear | HEPA vacuum, N95 mask, antimicrobial biocide |
| Level 2 (Medium) | 10 to 30 sq ft | Polyethylene plastic sheeting; negative air draft | HEPA air scrubber, P100 respirator, Tyvek suit |
| Level 3 (Large) | Over 30 sq ft | Full negative pressure isolation ward | Professional remediation crew required |
The Role of Relative Humidity (RH)
Fungal spores exist naturally everywhere in ambient outdoor air, but they require one specific engine to germinate: moisture. If your home’s relative humidity remains above 60%, spores activate and colonize building materials in as little as 24 to 48 hours. Keeping indoor relative humidity strictly between 30% and 50% stops new colonies from forming.
Step-by-Step Blueprint: The Definitive Mold Removal Guide Protocol
When addressing localized contamination under 10 square feet, follow this strict 4-phase protocol to prevent spreading spores to clean rooms:
Phase 1: Isolate the Work Zone
Turn off your central HVAC system completely to stop airflow across zones. Seal off doorway passages and air vents leading into the room using 6-mil heavy polyethylene sheeting and painter’s tape to establish localized containment.
Phase 2: Personal Protection Equipment (PPE)
Never touch active colonies without full gear. Put on an N95 or P100 half-face respirator, unvented safety goggles, nitrile gloves, and a disposable Tyvek suit to keep micro-spores off your clothes.
Phase 3: Physical Extraction over Scrubbing
Saturate non-porous surfaces (like tile or glass) with an EPA-registered antimicrobial fungicide. For porous materials like drywall, ceiling tiles, or carpet pad, do not attempt to wash them—cut out contaminated sheetrock 12 to 24 inches beyond the last visible spot using a utility knife.
Phase 4: HEPA Vacuuming and Air Scrubbing
Vacuum every hard surface inside the work zone using a true HEPA vacuum cleaner equipped with a sealed filtration loop. Standard shop vacuums lack micro-filters and will blast millions of active micro-spores directly back into your room’s air.
Expert Advice: Pro Tips and Hidden Warnings from a 10-Year Pro
A decade of tearing apart water-damaged structures reveals critical realities that standard DIY blogs omit:
Pro Tip: The Chlorine Bleach IllusionStop using liquid household chlorine bleach on porous drywall or wooden wall studs! Bleach consists of 90% water and 10% chemical chlorine. The chlorine chemical stays on the surface, while the water penetrates deep into porous wood, actually feeding the underlying hyphae roots and causing the colony to bounce back stronger two weeks later. Use an encapsulated quaternary ammonium compound or botanical biocide instead.
-
Hidden Warning #1: The Encapsulant Paint TrapNever apply anti-mold primer paint over an active, damp fungal patch. Encapsulating primers are designed to seal clean wood after mechanical removal and drying. Painting over active growth traps moisture inside the wall framing, rotting structural timber studs from within.
-
Hidden Warning #2: Hidden Moisture Pockets Behind BaseboardsBaseboards act as visual masks. If you had a minor floor leak, pull off the wooden baseboard trim along the wall. You will often find extensive black spore growth creeping up the unpainted bottom edge of the sheetrock paper.
Environmental Control: Eliminating the Root Cause
Cleaning existing growth is only half the battle; real risk mitigation means fixing the underlying moisture source:
-
Fix Plumbing Leaks Immediately: Repair leaking pipe elbows, valve stems, or roof flashing within 24 hours of discovery.
-
Install Commercial Dehumidifiers: In damp basements or crawlspaces, run a dedicated low-grain refrigerant (LGR) dehumidifier set to maintain 45% relative humidity.
-
Enhance Bathroom Ventilation: Verify that your bathroom exhaust fan moves at least 1 CFM per square foot of floor space and vents directly outdoors—never into an open attic space.
Protect Your Investment and Family Health
Managing indoor fungal threats is not an exercise in guesswork; it is an environmental safety discipline. By applying this comprehensive Mold Removal Guide, using true HEPA filtration, wearing proper PPE, and correcting underlying moisture issues, you protect your property’s equity and secure a healthy home environment.
Have you discovered suspicious wall spots or dealt with moisture issues in your home recently? What challenges are you facing with indoor air quality or humidity? Drop a comment below—I read and answer every question to help you safeguard your space!


