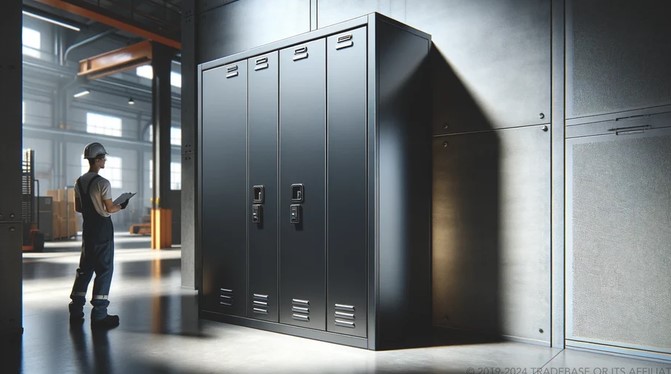
It was a sweltering July afternoon in 2016 when I walked into a commercial workshop to inspect a storage failure that nearly cost a contractor his entire business. A row of cheap, particle-board cabinet units had collapsed under the weight of heavy power tools, hydraulic jacks, and cans of volatile solvents. The shelves had bowed, the hinges sheared off, and thousands of dollars worth of precision gear crashed onto a damp concrete floor, sparking a chemical spill in the process.
That afternoon was a sobering reminder of an absolute law in workshop infrastructure: wood and plastic belong in living rooms, but raw utility demands steel.
When it comes to securing high-value tools, hazardous materials, or heavy industrial equipment, opting for a heavy-duty storage cabinet metal build is not an aesthetic choice—it is a critical investment in security, structural safety, and long-term asset protection.
Over the past decade, I have specified, assembled, and stress-tested hundreds of steel enclosure systems. Here is my deep-dive field guide to selecting, installing, and optimizing heavy-gauge metal storage without falling for flimsy retail traps.
The Physics of Steel Enclosures: Sheet Gauge and Load Capacities
To understand why a heavy-gauge storage cabinet metal unit holds up under brutal conditions, think of sheet metal like a cardboard box. A single sheet of thin cardboard sags when you press on it, but when you fold it into rigid geometric channels, its load-bearing capacity skyrockets.
In metal fabrication, sheet thickness is measured in gauge numbers—and here is where beginners often get confused: the smaller the gauge number, the thicker and stronger the steel.
24-GAUGE STEEL (Thin / Economy Grade)
[ 0.0239" ] ---> Easy to dent, flexes under heavy power tools

18-GAUGE STEEL (Commercial Standard)
[ 0.0478" ] ---> Rigid, handles medium machinery & hardware

14-GAUGE STEEL (Industrial Heavy-Duty)
[ 0.0747" ] ---> Reinforced structural integrity, dent & fire resistant
Understanding Structural Reinforcement
Thick steel alone isn’t enough. Look inside the door panels and beneath the shelf planes for hat-channel stiffeners—welded U-shaped steel channels that run horizontally or vertically. These channels distribute concentrated point loads evenly across the cabinet frame, preventing the dreaded center-shelf sag over time.
Technical Comparison: Gauge, Coatings, and Locking Mechanisms
Not all metal cabinets are built equal. When evaluating a prospective unit for your garage or facility, compare these core technical parameters:
| Feature / Metric | Light-Duty Consumer Cabinet | Commercial-Grade Storage Cabinet Metal | Heavy Industrial Enclosure |
| Steel Thickness | 22 to 24-Gauge | 18 to 20-Gauge | 12 to 14-Gauge |
| Shelf Weight Capacity | 75 – 150 lbs / shelf | 300 – 600 lbs / shelf | 1,000 – 1,900 lbs / shelf |
| Surface Finish | Wet Spray Paint (Prone to chipping) | Thermoset Powder Coating | Industrial Epoxy / Galvanized |
| Locking System | Single-Point Cam Lock | 3-Point Locking Rod System | Padlock Hasp with Mortise Lock |
| Hinge Architecture | Stamped Pin Hinges | Continuous Piano Hinges | Heavy-Duty Leaf / Welded Pins |
Core Security Features: Protecting Your Assets
A durable storage cabinet metal construction does more than hold heavy gear; it deters theft and resists physical tampering.
1. The 3-Point Locking Mechanism
Avoid single-point cam locks that only catch in the middle of the door frame. A true 3-point locking system extends steel latching rods into the top header, the bottom sill, and the center door frame simultaneously when you turn the handle. This eliminates lever points, preventing intruders from prying the door open at the corners with a crowbar.
       +-----------------------------------+
       |    [TOP LATCH ROD ENGAGEMENT]     |
       |                 ^                 |
       |                 |                 |
[CAM] <============== [HANDLE] ==============> [CAM]
       |                 |                 |
       |                 v                 |
       |   [BOTTOM LATCH ROD ENGAGEMENT]   |
       +-----------------------------------+
2. Continuous Piano Hinges
Traditional butt hinges leave exposed pins that can be tapped out with a hammer and punch. High-security steel cabinets utilize full-length piano hinges welded or riveted down the entire seam, eliminating pinch points and preventing sag even when doors are fully loaded with door-mounted tool racks.
Step-by-Step Installation & Anchor Protocol
An unanchored, top-heavy metal cabinet packed with heavy tools is a major tipping hazard. Here is the exact installation sequence we enforce on job sites:
Step 1: Leveling the Substrate
Concrete garage and workshop floors are pitched toward drainage points, meaning your floor is rarely flat.
-
Place the cabinet in position and use a 4-foot spirit level across the top and sides.
-
Use heavy-duty steel or hard rubber shims under the cabinet corner legs until the unit sits 100% plumb and level.
-
Unlevel cabinets cause door alignment issues, making 3-point locking rods bind or fail to catch smoothly.
Step 2: Wall and Floor Anchoring
An anchored unit cannot be tipped forward by an opening door or pulled away from the wall during a burglary attempt.
-
Locate the wall studs behind the cabinet using a stud finder.
-
Drill through the pre-punched mounting holes in the rear steel panel.
-
Secure the cabinet directly into wood studs using 5/16-inch x 2.5-inch lag screws with flat washers, or use sleeve anchors if mounting directly into concrete/masonry walls.
Expert Advice: Pro Tips & Hidden Warnings
Hidden Warning: Storing volatile flammable liquids (like gasoline, paint thinners, or acetone) in a standard steel storage cabinet is a major safety violation! Standard metal cabinets are not vapor-tight or heat-insulated. Flammable materials require a dedicated NFPA/OSHA-approved Flammable Storage Cabinet featuring double-walled 18-gauge steel with a 1.5-inch insulating air space, dual flame-arrestor vents, and a leak-proof bottom sump.
Keep these additional trade secrets in mind:
-
Watch Out for Powder Coat Quality: Ensure the unit features an electrostatically applied, heat-cured powder coat finish rather than wet enamel paint. Powder coating creates an impact-resistant, chemical-proof barrier that prevents humidity from creeping into raw steel and causing rust underneath.
-
Respect Shelf Load Distribution: Always store your heaviest items (like engine blocks, heavy cases, or bulk hardware) on the bottom shelf to lower the cabinet’s center of gravity.
-
Control Internal Moisture: Metal enclosures trap ambient humidity during temperature swings. Toss a vapor-phase corrosion inhibitor (VCI) pod or a rechargeable desiccant pack inside the unit to protect bare steel tools from surface rust.
Secure Your Workshop Infrastructure
Upgrading your workshop security isn’t about buying flimsy consumer furniture—it is about engineering an impenetrable, reliable environment for your high-value assets. By selecting a thick-gauge, powder-coated storage cabinet metal unit equipped with a 3-point locking system and anchoring it firmly to your structure, you ensure your equipment stays safe, organized, and ready for work every single day.
How are you currently securing high-value tools and materials in your garage or shop? Are you using heavy steel or looking to upgrade from wood shelving? Leave a comment below with your setup or questions—I’d love to help you optimize your storage strategy!
