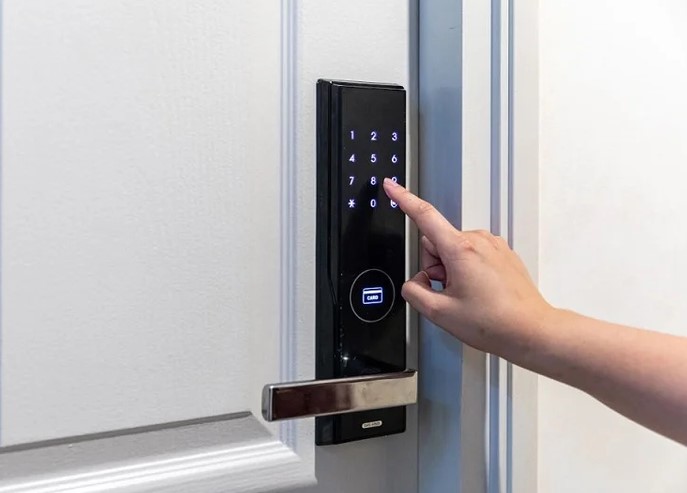
It was 11:30 PM on a freezing rainy night in 2017 when I got an panicked call from a client. She had just locked herself out of her home while taking out the trash—barefoot, without a phone, and with her two-year-old child asleep inside. By the time I arrived with lock picks to bypass the standard pin-tumbler deadbolt, she was shivering and terrified. That 15-minute emergency response was my absolute tipping point.
I spent the next weekend retrofitting her entire exterior perimeter with commercial-grade electronic access hardware.
Traditional physical keys are a 4,000-year-old technology with built-in vulnerabilities: they get lost, copied without permission, hidden under predictable doormats, and leave zero audit trail. Upgrading to a modern keypad door lock is no longer a luxury gimmick—it is a fundamental step in hardening your property’s primary entry points against unauthorized access.
Here is a deep dive into the mechanics, security ratings, and field-tested installation steps to upgrade your perimeter security like a pro.
Mechanics of Digital Locks: Motorized Deadbolts vs. Clutch Systems
To understand how a keyless system secures a door frame, think of a electronic lock like a manual transmission car.
In a traditional deadbolt, inserting the brass key aligns internal pins so the plug can rotate the tailpiece manually. A modern keypad door lock replaces that mechanical key with an electronic actuator or motor mechanism. When you enter the correct PIN code on the touch interface, the lock’s internal control board sends a low-voltage electrical impulse to trigger the locking drive.
USER ENTER PIN ===> LOGIC BOARD VERIFIES CODE ===> ACTUATOR ENGAGES CLUTCH/MOTOR ===> DEADBOLT EXTENDS/RETRACTS
Electronic deadbolts generally come in two distinct operational architectures:
-
Motorized Driven Deadbolts: A small internal electric motor physically drives the heavy metal bolt shaft back and forth into the door jamb strike plate automatically.
-
Clutch-Based Lever Locks: The outside lever or knob spins freely (disengaged) until you enter the correct code. Once verified, an internal solenoid engages the drive clutch, allowing your physical hand turn to retract the latch bolt.
Security Grading and Build Quality: ANSI/BHMA Standards
Not all keyless entry systems offer equal protection. Over my decade in home improvement, I’ve seen cheap plastic-housing keypads sheared off door panels with a simple claw hammer.
When shopping for a keypad door lock, ignore fancy marketing buzzwords and look straight at the ANSI/BHMA (American National Standards Institute) security certification grade stamped on the box.
| BHMA Rating | Security Level | Physical Impact Resistance | Ideal Application |
| Grade 1 | Commercial Heavy-Duty | Highest (Tested up to 10 million cycles & heavy blows) | Exterior perimeter doors, high-value storage, rental properties |
| Grade 2 | Residential Advanced | High (Exceeds standard residential security requirements) | Main front doors, attached garage entryways |
| Grade 3 | Basic Residential | Moderate (Standard builder-grade physical protection) | Interior home offices, utility rooms, interior side doors |
Always choose a Grade 1 or Grade 2 lock body forged from solid zinc alloy or hardened steel to ensure high resistance against forced entry and mechanical drilling.
Step-by-Step Retrofit Installation Protocol
Upgrading from a standard mechanical lock to a keyless system is a straightforward DIY project, provided you follow proper mechanical alignment procedures.
Step 1: Door Prep and Backset Verification
Before buying hardware, measure your door’s exact dimensions using a tape measure:
-
Backset Distance: Measure from the edge of the door to the center of the lock hole. Standard residential doors are either 2-3/8 inches (60mm) or 2-3/4 inches (70mm).
-
Door Thickness: Ensure your door thickness is between 1-3/8 inches and 1-3/4 inches—thicker exterior custom doors may require specialized extension tailpieces.
Step 2: Installing the Latch Bolt and Strike Plate
Install the new strike plate and deadbolt latch into the door edge Mortise cutout.
-
Ensure the word “UP” stamped on the bolt mechanism faces upward.
-
Extend the bolt into the locked position using a screwdriver before mounting the exterior keypad housing.
-
Replace the short 3/4-inch screws on the door frame strike plate with 3-inch hardened steel screws anchored directly into the structural wall studs behind the door frame.
       [DOOR FRAME STRIKE PLATE]
                  ||
       (Short Screws) ===> Weak (Attaches to soft door jamb only)
       (3-Inch Screws) ===> Reinforced (Anchors directly into 2x4 framing studs)
Step 3: Routing the Data Cable and Mounting Internal Assemblies
Feed the delicate ribbon data cable beneath the latch bolt mechanism through the prep hole. Fasten the steel interior mounting plate tightly against the interior door face.
Connect the cable harness into the circuit board on the interior housing, align the D-shaped mechanical tailpiece into the thumb-turn spindle, and secure the housing with mounting bolts.
Expert Advice: Pro Tips & Hidden Warnings
Hidden Warning: The single biggest reason electronic deadbolts fail prematurely or drain batteries in weeks is latch binding. If you have to physically pull or push your door hard to lock it manually, your frame is misaligned. Forcing a motorized keypad door lock to drive a bolt into a misaligned strike pocket causes severe motor drag, draining four AA alkaline batteries in a month instead of a year. Always file out the frame strike pocket until the bolt throws completely smooth without friction.
Keep these essential field rules in mind:
-
Use the Decoystring/Anti-Peeping Feature: Modern touch keypads allow you to enter random dummy numbers before or after your real PIN (e.g., 9482 1234 0192). This prevents onlookers from guessing your combination by watching finger movements or spotting oily fingerprint smudges on specific numbers.
-
Never Use Lithium or Rechargeable Batteries Unless Specified: Most smart and electronic locks are calibrated specifically for 1,5V AA Premium Alkaline batteries. Rechargeable NiMH batteries drop voltage rapidly, leading to erratic motor performance or unexpected lockouts.
-
Maintain Physical Key Overrides: Always choose a model that retains a physical key cylinder concealed under a removable faceplate, or includes external 9V battery jumper terminals on the bottom of the keypad to power the lock temporarily if internal batteries die completely while you are away.
Hardening Your Home’s First Line of Defense
Transitioning to keyless security isn’t just about eliminating key-hunting on rainy nights—it is about taking control of your home’s physical perimeter. By installing a high-grade, properly aligned keypad door lock, you eliminate physical key vulnerabilities, create trackable guest codes, and significantly boost your daily operational convenience.
Are you planning to upgrade your exterior doors to keyless entry, or do you have technical questions about door prep and mechanical alignment? Drop your comments or questions below—I’d love to help you dial in your perimeter security!

