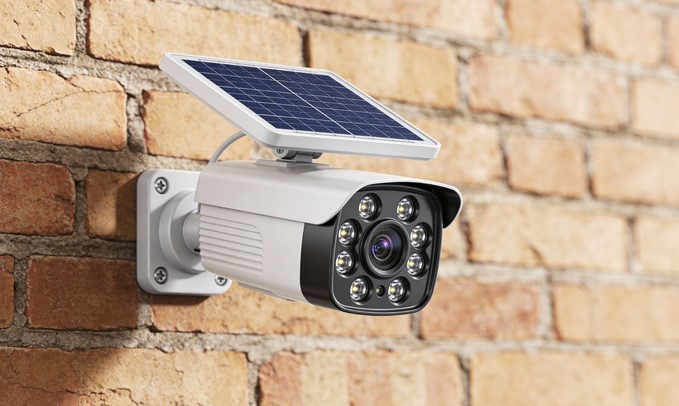
A client once called me out to his rural property in utter frustration after his brand-new smart security system kept failing. He had spent thousands on high-definition wireless cameras to monitor a detached barn and perimeter gate, but every three weeks he found himself dragging an extension ladder across two acres of muddy yard just to unmount the cameras and charge their internal batteries inside.
To solve it, he tried mounting a small off-the-shelf solar panel directly underneath the roof eaves right next to the camera lens. The result? Total shade for 20 hours a day, a completely drained battery, and a blind spot along his main entryway.
We uninstalled the jerry-rigged setup and re-engineered the installation using a heavy-duty, fully adjustable solar camera mount. Within an hour, we separated the solar collector’s orientation from the camera’s optical angle, locking in 100% continuous battery charge and uninterrupted security coverage.
Over my ten-plus years in home improvement, electrical retrofits, and perimeter security installations, I’ve learned that a solar-powered camera is only as good as its exposure. Achieving true off-grid reliability isn’t about buying a bigger battery; it’s about mastering the spatial geometry of your mounting hardware.
The Physics of Solar Positioning: Decoupling Sightlines from Sunlines
The single biggest mistake DIYers make with solar-powered security is assuming the camera lens and the solar panel need to face the exact same direction.
Your camera’s job is to look at blind spots, entry doors, driveways, and dark corners—areas that are often heavily shaded by porch roofs, gables, or dense tree canopies. A solar panel’s job is the exact opposite: it needs direct, unshaded sunlight for as many hours as possible.
Think of a security camera like a watchful guard tower, while the solar panel acts like a satellite dish. Trying to force both components onto a single rigid bracket facing the same direction is like forcing a guard to glare directly into the blinding sun all day just to watch a doorway behind him. A specialized solar camera mount decouples these two elements, allowing the camera to point down into the shadows while the solar panel tilts up toward the sun.
       RIGID COMBINED MOUNT                      DECOUPLED SOLAR CAMERA MOUNT
   (Shaded Panel = Dead Battery)              (Optimal Sightline + Maximum Charge)

     +-----------------------+                  +-----------------------+
     | Roof Eave / Shade     |                  | Roof Eave / Shade     |
     |  [Panel] (In Shade!)  |                  |                       |
     |  [Camera] -> Security |                  |  [Camera] -> Security |
     +-----------------------+                  +-----------------------+
                 |                                          |
                 v                                          | (Extension Arm)
       System Dies in 14 Days                               v
                                                +-----------------------+
                                                | [Solar Panel]         |
                                                | (Rotated to South)    |
                                                +-----------------------+
Eliminating Shading Traps
Even partial shading on a solar collector can reduce its energy output by up to 80%. A single tree branch casting a thin shadow across 10% of a monocrystalline panel disrupts the internal cell circuit flow.
By using a multi-articulating mounting arm, you can bridge the distance between dark surveillance zones and high-irradiance mounting points on your roof fascia or wall siding.
Deciphering Mount Anatomy: Brackets, Arms, and Materials
Choosing the right hardware configuration ensures your solar surveillance array withstands high winds, ice accumulation, and material fatigue.
+--------------------------------------------------------------------------+
|                  ADJUSTABLE SOLAR CAMERA MOUNT ANATOMY                   |
|                                                                          |
|   /====\  <- Weatherproof Anodized Aluminum / Stainless Steel Plate       |
|     ||                                                                   |
|   ( O )   <- Dual 360-Degree Ball-and-Socket Swivel Joint               |
|     ||                                                                   |
|   [====]  <- Universal 1/4"-20 Threaded Security Post / Arm Connector    |
|     ||                                                                   |
|     ||    <- Hollow Cable Channel (Protects Micro-USB/USB-C Power Lead)  |
|     ||                                                                   |
|     \/    <- Reinforced Heavy-Duty Baseplate with Silicone Gaskets       |
+--------------------------------------------------------------------------+
1. Dual 360-Degree Swivel Arms
Look for mounts featuring dual-articulating ball joints at both the base and the panel attachment head. This allows for independent pan (horizontal rotation) and tilt (vertical elevation) adjustments, enabling you to dial in precise solar angles regardless of your wall’s slant.
2. Powder-Coated Aluminum vs. ABS Plastic
-
Polycarbonate/ABS Plastic Mounts: Acceptable for light-duty residential use under eaves, but cheap plastics degrade and crack under continuous UV exposure within 2 to 3 years.
-
Anodized/Powder-Coated Aluminum: The professional choice. It resists UV breakdown, holds up against coastal salt spray, and won’t flex or sag during heavy winter snow loading.
Technical Performance Matrix: Solar Azimuth & Tilt Metrics
To maximize energy harvest throughout the year, your solar camera mount must be angled based on your geographic latitude.
| Geographic Region | Recommended Panel Azimuth (Direction) | Optimal Solar Tilt Angle | Winter Adjustment Factor |
| Northern Hemisphere | True South (Not Magnetic South) | Equal to your Latitude | Latitude + 15 Degrees |
| Southern Hemisphere | True North | Equal to your Latitude | Latitude + 15 Degrees |
| Equatorial Regions | East / West Neutral | 10 to 15 Degrees | Fixed Flat / Slight Angle |
Pro Tip: In the Northern Hemisphere, always point your solar panel toward True South using a compass app that corrects for magnetic declination. If your roofline faces East or West, angle your adjustable mount toward the Southwest to capture maximum afternoon sun when panel temperatures are optimal.
Installation Protocol: Ensuring Weather-Tight Seals
Installing outdoor security hardware requires protecting your building envelope from water intrusion. Here is the step-by-step protocol I use on job sites:
+--------------------------------------------------------------------------+
|                     4-STAGE INSTALLATION WORKFLOW                        |
|                                                                          |
|   +-------------------+      +-------------------+      +------------+   |
|   | 1. Solar Audit    | ---> | 2. Structural     | ---> | 3. Drip Loop|   |
|   |    & Positioning  |      |    Anchoring      |      |    Routing |   |
|   +-------------------+      +-------------------+      +------------+   |
|                                                                |         |
|                                                                v         |
|                              +-------------------+      +------------+   |
|                              | 5. Final Angle    | <--- | 4. Seal    |   |
|                              |    Calibration    |      |    Gaskets |   |
|                              +-------------------+      +------------+   |
+--------------------------------------------------------------------------+
Step 1: Structural Anchoring
Never rely solely on hollow-wall plastic drywall anchors when mounting solar brackets to exterior lap siding or stucco. Always drive stainless steel lag screws directly into wood wall studs, roof rafter tails, or solid masonry.
Step 2: The Drip Loop Wire Routing
When running the low-voltage power cable from the solar panel to the camera, always leave a small 2-inch downward U-shaped bend (a drip loop) in the cable right before it enters the camera body or wall penetration.
Rainwater running down the wire will pool at the bottom of the loop and drip harmlessly off the cable rather than following the wire directly into the camera’s micro-USB charging port.
       WITHOUT DRIP LOOP                        WITH DRIP LOOP
    (Water Enters Power Port)               (Water Drips Off Safely)

     Solar Wire                              Solar Wire
          \                                       \
           \                                       \      /---> Camera
            \---> Camera Port                       \____/  (Drip Loop!)
                                                      |
                                                      v (Water Falls Off)
Expert Advice: Hidden Pitfalls to Avoid
Even an experienced installer can hit a snag if seasonal factors are overlooked. Keep these two warnings in mind before drilling into your exterior walls:
Hidden Pitfall 1: Ignoring the “Winter Sun Arc” Trap
A mounting location that gets six hours of direct sunlight in July might be completely shaded in December when the sun sits lower on the horizon and nearby deciduous trees bare their branches (or pine trees block low angles). Always mount your solar panel higher on the wall frame to clear low winter sun obstructions.
Hidden Pitfall 2: Over-Tightening Threaded Lock Rings
Most solar panel brackets use a knurled aluminum locking ring to hold the swivel ball joint in place. Hand-tighten this collar firmly, but never use slip-joint pliers or pipe wrenches to force it further. Excessive torque can crack the internal ball-joint casting, causing the panel to droop during high winds.
Maximize Your Perimeter Protection
Upgrading your home’s security network shouldn’t require constant maintenance or climbing ladders to recharge batteries. By decoupling your sightlines from your sunlines and utilizing a heavy-duty, fully adjustable solar camera mount, you create an autonomous, self-sustaining surveillance grid that protects your property year-round.
Take a walk around your home’s exterior today. Are your solar-powered security cameras struggling for light in shaded corners?
What perimeter surveillance setup or off-grid power challenges are you currently tackling around your home? Drop your questions or system specs in the comments below, and let’s optimize your security coverage together!
