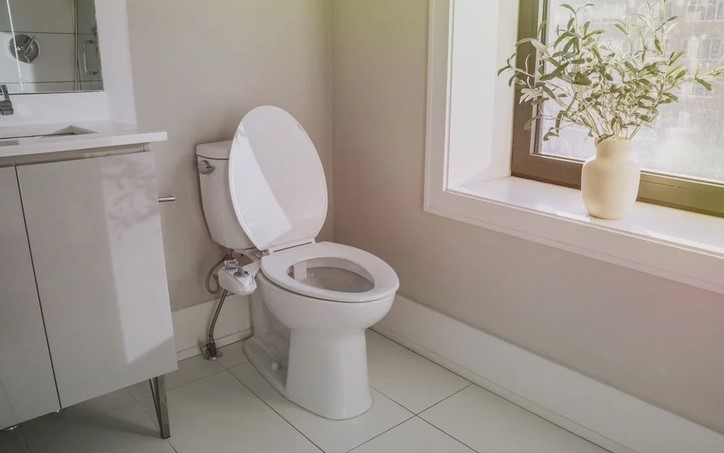
During the spring toilet paper shortage a few years back, my phone rang off the hook with panicked clients asking if they needed to drop $1,500 on a high-end integrated Japanese smart toilet just to stay clean. I gave them all the exact same advice: spend $40, grab an adjustable wrench, and install a retrofitted mechanical bidet seat insert in twenty minutes flat.
I’ve installed everything from $5,000 wall-hung smart toilets in luxury master baths to simple $35 mechanical sprayers in studio apartments. What still blows my mind is that a basic, mechanical bidet attachment DIY project delivers roughly 90% of the hygiene, comfort, and environmental benefits of an expensive luxury fixture at less than 5% of the overall cost.
If you are looking to modernize your bathroom, slash your household paper consumption, and tackle a satisfying weekend plumbing project, this comprehensive guide will take you through the technical steps without risking a flood in your home.
The Hydraulics of the Bidet: How Mechanical Attachments Work
To understand how a mechanical bidet functions without needing electrical power, think of it like a garden hose fitted with a fine spray nozzle.
Your home’s clean water supply pipe sits under continuous pressure—typically between 40 and 60 Pounds per Square Inch (PSI). A non-electric bidet does not need a motorized pump. Instead, it harnesses this existing municipal water pressure. When you turn the control dial, an internal flow control valve opens, directing water straight through retractable polymer nozzles.
+-------------------------------------------------------------------+
|                  WALL WATER SHUT-OFF VALVE (FILL VALVE)            |
+-------------------------------------------------------------------+
                                  |
                                  v
+-------------------------------------------------------------------+
|                        BRASS T-VALVE ADAPTER                      |
|           (Splits clean water into two dedicated paths)           |
+-------------------------------------------------------------------+
        |                                                   |
        v                                                   v
+---------------+                                   +---------------+
| Toilet Tank   |                                   | Mechanical    |
| Fill Hose     |                                   | Bidet Control |
+---------------+                                   +---------------+
                                                            |
                                                            v
                                                    +---------------+
                                                    | Retractable   |
                                                    | Spray Nozzle  |
                                                    +---------------+
The smart engineering lies in the retractable nozzle guard. When the water pressure is turned off, internal springs pull the nozzle back behind a protective shield, keeping it clean and completely free from splash-back during regular toilet use.
Cost-Benefit Analysis: Paper vs. Water Upgrades
If you are evaluating whether a bidet attachment DIY project is worth your afternoon, the financial and environmental numbers make a compelling case.
| Parameter | Standard Toilet Paper Usage | Mechanical Bidet Attachment Upgrade |
| Average Initial Cost | $0 (Initial setup) | $35 – $70 (One-time purchase) |
| Ongoing Yearly Cost | ~$120 – $180 per person (Paper supply) | ~$5 per year (Negligible water usage) |
| Water Consumption | ~37 Gallons to manufacture 1 roll of TP | ~1/8 Gallon per wash cycle |
| Plumbing Risk | High risk of pipe clogs and sewer backups | Zero risk of paper-induced drain line clogs |
| Electrical Requirement | None | None (100% pressure-driven) |
Beyond the obvious financial payback period of under six months, removing heavy paper loads from your home’s main sewer line dramatically reduces the risk of expensive drain clearouts.
Step-by-Step Installation Protocol: The Leak-Proof Method
Installing a bidet attachment is an ideal starter project for beginner DIYers. However, skipping simple sealing steps can result in floor-damaging water leaks. Here is the exact installation sequence I use on job sites.
1. Tool Preparation and Workspace Audit
Gather your supplies before touching a single plumbing fitting:
-
Adjustable crescent wrench
-
Plumber’s Thread Seal Tape (PTFE/Teflon Tape)
-
Clean microfiber towels and a small catch basin
-
Your mechanical bidet attachment kit
2. Isolating the Water Supply and Draining the Tank
Shut off the incoming water supply completely by turning the metal shut-off valve behind the toilet clockwise until tight.
-
Flush the toilet and hold the handle down until the water drains out of the tank completely.
-
Sponge out any remaining water left at the bottom of the tank so it doesn’t spill onto your floor.
-
Place a towel and catch basin directly under the fill valve connection.
       +----------------------------+
       |     TOILET WATER TANK      |
       +----------------------------+
                     ||
      [Fill Valve Threaded Stem]
                     ||
          +----------------------+
          |   BRASS T-ADAPTER    | <=== Connect bidet hose here
          +----------------------+
                     ||
      [Flexible Braided Supply Line]
                     ||
                     v
        (Wall Shut-Off Valve)
3. Mounting the T-Valve and Bidet Body
Remove your existing toilet seat by unbolting the two hinge nuts underneath the bowl rim.
Position the thin bidet attachment plate over the bolt holes, align it centrally across the bowl rim, and re-attach your toilet seat on top of the bidet plate. Tighten the bolts firmly, but do not overtighten plastic hardware to avoid cracking the ceramic bowl.
Unscrew the flexible water line from the bottom of the toilet tank. Thread your metal T-valve adapter directly onto the tank’s threaded fill valve stem. Reattach the main water line to the bottom port of the T-valve, and attach the flexible bidet supply hose to the side port.
Expert Advice: Pro Tips & Hidden Warnings
Hidden Warning: The number-one mistake people make during a bidet attachment DIY install is cross-threading or over-tightening plastic fill valve threads. Most modern toilet fill valves are made of rigid plastic. If you forcefully thread a metal T-valve onto plastic threads at an angle, you will strip the soft plastic threads instantly, causing a continuous slow drip that requires replacing the entire fill valve assembly. Always hand-tighten metal connections first until snug, then give it a 1/4-turn with a wrench.
Keep these trade rules in mind during your project:
-
Inspect the Washer Seals: Always check that the rubber O-rings or flat rubber washers are seated flat inside both ends of your T-adapter and supply hoses before tightening. Missing washers are the primary cause of sudden leaks.
-
Add Seat Bumpers: Adding a bidet plate under your toilet seat hinges raises the back of the seat by roughly 1/4 to 1/2 inch. Install self-adhesive rubber seat bumpers along the front underside of the toilet seat so it sits level on the ceramic rim without putting structural stress on the hinges.
-
Test Slowly: When turning the main water valve back on, open it slowly while watching every joint closely with a flashlight. Dab a dry paper towel against each connection point—if the paper comes away damp, give the fitting a gentle quarter-turn adjustment.
Enjoying a Modernized Workspace
Upgrading your bathroom doesn’t require tearing down tile walls or hiring high-priced plumbing subcontractors. By completing a bidet attachment DIY installation, you add high-end functionality, lower your household utility expenses, and build real plumbing confidence using simple hand tools.
Have you considered adding a bidet attachment to your bathroom, or are you running into technical issues with your current toilet plumbing layout? Drop your questions or project updates in the comments below—I’d love to help you troubleshoot your build!
