I once received an urgent call from a distraught homeowner three weeks after he had finished restoring a set of solid oak kitchen countertops. He had spent dozens of hours sanding the wood down to a velvety finish and applying a rich, deep stain. But instead of using a true protective topcoat, he wiped on a cheap decorative oil finish.
By week three, daily water splashes around the sink had penetrated the grain, leaving black ring stains, while hot coffee mugs had raised cloudy white rings across the island bar. Watching all that painstaking handiwork dissolve into ruined timber broke my heart, but it was completely preventable.
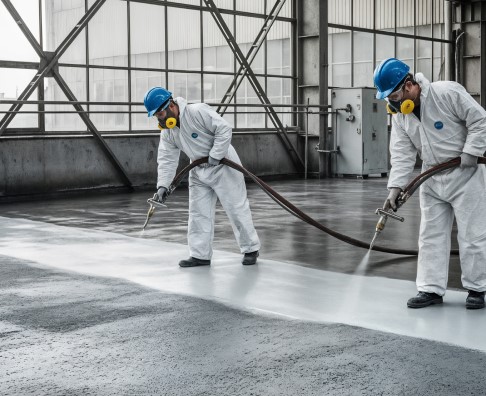
In my over ten years of hands-on custom woodworking, flooring installations, and surface restorations, I have learned that a stain provides color, but protection requires engineering. When you need to armor high-traffic wood, concrete, or painted surfaces against moisture, abrasion, and UV degradation, nothing compares to the protective shell created by a high-grade polyurethane clear coat.
The Chemistry of Curing: How Polyurethane Creates an Armor Shield
To understand why polyurethane outperforms basic varnishes and natural oils, you have to look at how it dries and cures on a molecular level. Most basic finishes simply dry when their solvents evaporate, leaving behind a soft, vulnerable film of resin.
Think of an unprotected wood surface like a clean cotton t-shirt. Liquid wax or natural oil is like spraying water repellent onto that shirt—it helps temporarily, but friction and laundering wear it off quickly. A polyurethane clear coat, on the other hand, acts like laminating that shirt in a flexible, shatterproof layer of clear armor plate.
       NATURAL OIL / WAX FINISH                      POLYURETHANE CLEAR COAT
    (Soaks in, minimal surface film)             (Cross-linked polymer armor matrix)

    +------------------------------+             +------------------------------+
    | Liquid Spills / Scratches    |             |  POLYURETHANE SHELL MATRIX   |
  ===> [Penetrates Surface Grain] <===         ===> [Bounces Off Protective Film]<===
    +------------------------------+             +------------------------------+
    | Wood / Substrate Fibers      |             | Wood / Substrate Fibers      |
    +------------------------------+             +------------------------------+
Thermal Polymerization and Cross-Linking
When polyurethane cures, a chemical reaction called polymerization takes place. Long chains of polyurethane molecules form tight cross-linked bonds with one another as the liquid evaporates.
This creates a continuous, plasticized membrane that expands and contracts with the natural seasonal movement of the underlying wood, preventing liquid water, household acids, and abrasive dirt from ever making contact with the underlying fibers.
Deciphering Formulations: Water-Based vs. Oil-Based Systems
Choosing the wrong formulation for your environment is the quickest way to ruin an otherwise flawless finishing job. Both water-based and oil-based clear coats have specific performance metrics.
+--------------------------------------------------------------------------+
|                 POLYURETHANE CLEAR COAT FORMULATIONS                     |
|                                                                          |
|   +---------------------------------+  +------------------------------+  |
|   |   WATER-BASED POLYURETHANE      |  |   OIL-BASED POLYURETHANE     |  |
|   |  * Crystal-clear clarity        |  |  * Warm amber tone           |  |
|  |  * Low VOCs & rapid dry time    |  |  * High heat & chemical resistance |  |
|   |  * Easy soap-and-water cleanup  |  |  * Long open time for leveling|  |
|   +---------------------------------+  +------------------------------+  |
+--------------------------------------------------------------------------+
1. Water-Based Polyurethane
Formulated with acrylic and urethane resins suspended in water, this modern option dries rapidly (often within 2–3 hours per coat) and emits minimal Volatile Organic Compounds (VOCs).
-
Color Profile: Dries completely crystal-clear without yellowing over time.
-
Best For: Light woods (maple, ash, white oak), painted furniture, and indoor projects where low odor is critical.
2. Oil-Based Polyurethane
Formulated with synthetic resins, alkyds, and petroleum solvents, oil-based formulas dry much slower (8–24 hours per coat) but offer superior high-build film thickness.
-
Color Profile: Imparts a rich, warm amber hue that deepens the natural grain of dark woods like walnut or mahogany.
-
Best For: Heavy-use hardwood floors, kitchen countertops, and surfaces exposed to constant heat or chemicals.
Technical Comparison Matrix: Selecting Your Finish
Matching your application method and formulation to your project scope keeps your timeline on schedule and guarantees maximum durability.
| Performance Metric | Water-Based Polyurethane | Oil-Based Polyurethane | Exterior-Grade Spar Urethane |
| Drying Time Between Coats | 2 to 4 Hours | 8 to 12 Hours | 12 to 24 Hours |
| Cure Time to Full Hardness | 7 to 14 Days | 21 to 30 Days | 30 Days |
| Ambering Effect (Yellowing) | None (Stays Water-Clear) | Moderate Ambering | Heavy Warm Ambering |
| UV Blocker Integration | Low to Moderate | Low | High (Additive Shield) |
| Cleanup Solvent | Warm Soap and Water | Mineral Spirits / Paint Thinner | Mineral Spirits / Paint Thinner |
Application Protocol: Achieving a Glass-Smooth Finish
Applying a polyurethane clear coat is an exercise in surface preparation and chemical timing. Here is the field-tested workflow I use in my shop to guarantee a mirror-smooth finish without brush marks or dust nibs:
+--------------------------------------------------------------------------+
|                     4-STAGE COATING APPLICATION FLOW                     |
|                                                                          |
|   +-------------------+      +-------------------+      +------------+   |
|   | 1. Prep & Tacking | ---> | 2. First Coat     | ---> | 3. Inter-  |   |
|   | (Sanding to 220)  |      |    Thin Layer     |      |    Coat    |   |
|   +-------------------+      +-------------------+      |    Sanding |   |
|                                                         +------------+   |
|                                                                |         |
|                                                                v         |
|                              +-------------------+      +------------+   |
|                              | 5. Final Cure     | <--- | 4. Final   |   |
|                              |    (Full Shield)  |      |    Pass    |   |
|                              +-------------------+      +------------+   |
+--------------------------------------------------------------------------+
Step 1: Substrate Preparation and Tacking
Sand the surface progressively up to 220-grit sandpaper. Vacuum away all loose sawdust, then wipe the entire area down with a microfiber tack cloth soaked in mineral spirits (for oil-based) or denatured alcohol (for water-based). A single trapped speck of dust will multiply into a visible bump once encased in liquid clear coat.
Step 2: The Initial Seal Pass
Apply the first thin layer using a high-quality synthetic filament brush for water-based formulas, or a natural foam applicator/China-bristle brush for oil-based formulas. Maintain a wet edge and avoid over-brushing. Never shake a can of polyurethane before use—shaking introduces micro-bubbles that get locked into the cured film. Always stir slowly with a flat wooden stir stick.
Step 3: Inter-Coat Mechanical Abrasion
Once the first coat is completely dry to the touch, light inter-coat sanding is mandatory. Use 320-grit or 400-grit silicon carbide sandpaper to lightly abrade the surface. This removes raised wood grain fibers (dust nibs) and creates micro-scratches that allow the second coat to form a strong mechanical bond with the first. Vacuum and tack clean before applying subsequent coats.
Expert Advice: Hidden Pitfalls to Avoid
Even seasoned DIYers occasionally encounter curing problems when applying clear finishes. Keep these critical field warnings in mind:
Hidden Pitfall 1: Applying Water-Based Clear Coat Over Fresh Oil Stain
Water and oil do not mix. If you apply a water-based polyurethane clear coat over an oil-based wood stain that hasn’t fully off-gassed (which often takes 42 to 72 hours), the topcoat will fail to adhere. It will bubble, turn milky, and eventually peel off in large sheets. Always ensure oil stains are completely dry before sealing with water-based formulas.
Hidden Pitfall 2: Trapping High Humidity During Curing
Polyurethane requires ambient temperatures between 65°F and 80°F and relative humidity below 65% to cure properly. Applying a clear coat in a cold, damp garage traps moisture inside the wet film, causing a cloudy, hazy sheen known as “blushing” that cannot be buffed out once fully hardened.
Preserve Your Craftsmanship with Confidence
Investing time into woodworking, flooring, or surface restoration without applying a high-performance topcoat is a recipe for premature wear and frustration. Equipping your workshop with the right formulation of polyurethane clear coat ensures that your hard work remains vibrant, waterproof, and protected against everyday life for decades to come.
Take a look at your home’s high-wear surfaces this weekend. Are your dining tables, wood trims, or countertops showing signs of seal failure?
What high-traffic surfaces or custom woodworking projects are you planning to seal next? Drop your finishing questions or project details in the comments below, and let’s troubleshoot your sealing strategy together!
