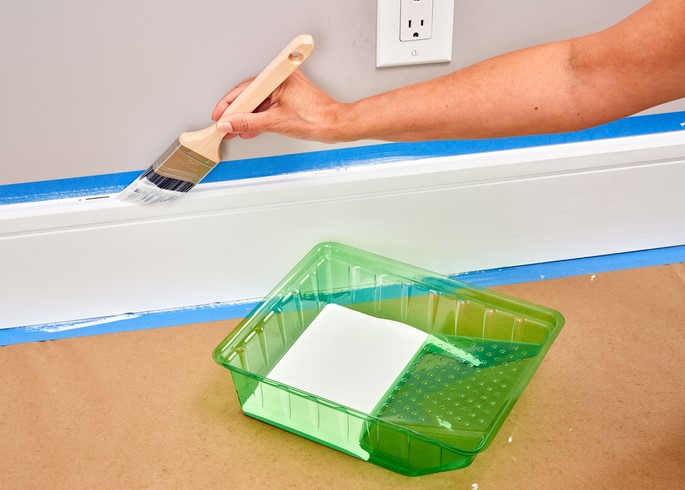
I once stepped into a gorgeous historic remodel where the homeowner had spent nearly three weeks meticulously rolling the walls with a trendy, expensive matte charcoal paint. The walls looked absolutely flawless—until you glanced down at the baseboards. The trim was plagued by jagged, uneven paint lines, visible brush textures, and ugly runs that had pooled and dried like plastic teardrops. That single, messy detail dragged the entire room from looking like a million-dollar designer showcase to an obvious, rushed weekend DIY blunder.
In the world of home renovation, your walls are the stage, but the trim is the frame that holds the entire picture together. Professional painting contractors know a universal truth: trim work accounts for only about 15% of a room’s surface area, but it commands over 80% of the visual scrutiny. If your trim lines are sloppy, the entire paint job looks cheap.
The good news is that achieving crisp, factory-smooth millwork finishes doesn’t require a lifetime of master apprenticeship. By shifting your approach from a chaotic rush to a systematic protocol, these professional painting trim tips will help you unlock flawless, razor-sharp results every single time.
The Physics of Smoothness: Why Trim Paint Acts Differently
To understand why painting baseboards, casings, and crowns feels so frustrating compared to painting flat drywall, think of your paint as a layer of liquid glass. When you roll a wide, flat wall, the surface tension spreads evenly. However, when you apply paint to the sharp profiles, beads, and revets of a piece of trim, gravity and surface tension work against you, pulling the wet film away from outside corners and pooling it inside deep grooves.
This is why your choice of coating chemistry is absolutely critical. Standard wall paint is formulated to dry quickly to prevent sagging on vertical surfaces, but trim requires a coating with excellent leveling properties.
Modern professional standards rely heavily on waterborne alkyd enamels. This hybrid chemistry gives you the easy cleanup of water-based acrylics, but it mimics the slow-drying, self-leveling nature of old-school oil paints. As it cures, it flattens out like a liquid mirror, completely erasing your physical brush marks before locking into an incredibly hard, impact-resistant shield.
The Arsenal: Selecting the Right Substrates, Brushes, and Extenders
Before dipping into a can of paint, you must equip yourself with the correct technical tools. Using a cheap, stiff polyester brush on premium millwork is an immediate recipe for failure.
1. The Angle Sash Brush: Your Primary Instrument
Never use a flat, square-cut brush for trim work. You need a 2-inch or 2.5-inch angled sash brush made from a soft nylon-polyester blend. The angled bristles act like the point of a fountain pen, allowing you to feed a precise line of paint into tight corners and along delicate transitions with surgical control.
2. Paint Extenders: The Secret to Eliminating Brush Strokes
If you are working in dry or warm environments, your paint will dry too quickly, freezing your brush strokes in place. This is where a chemical paint conditioner or extender (like Floetrol) comes into play. Adding just a few ounces to your can extends the “open time” of the coating, allowing the wet film to remain fluid just long enough to flatten out beautifully.
3. The Painters Tape Paradox
-
Blue Tape: Great for general masking, but can leak if not sealed correctly.
-
Delicate Surface (Yellow) Tape: Essential if you are masking over freshly painted walls to prevent pulling off the base coat.
Step-by-Step Execution: The Professional Trim Protocol
Achieving a flawless finish is entirely about following a systematic prep and application sequence. Skipping the foundation work guarantees an inferior final result.
                  [ The Trim Prep Layering Hierarchy ]
   +------------------------------------------------------------+
   |  [Layer 4] Topcoat: Waterborne Alkyd Enamel (2 Coats)     |
   +------------------------------------------------------------+
   |  [Layer 3] Sanding: 220-Grit Micro-Scuffing & Tack Cloth   |
   +------------------------------------------------------------+
   |  [Layer 2] Foundation: Premium Acrylic Caulking & Wood Filler|
   +------------------------------------------------------------+
   |  [Layer 1] Substrate: Cleaned, Degreased Wood/MDF          |
   +------------------------------------------------------------+
Step 1: Substrate Preparation and Degreasing
Trim lives at the lowest and highest points of a room, meaning it accumulates an immense amount of dust, pet hair, and skin oils. Scrub the entire surface down with a mild solution of TSP (Trisodium Phosphate) or a dedicated degreaser. If paint is applied over microscopic oils, it won’t bond correctly and will eventually peel off in long, rubbery strips.
Step 2: Mechanical Abrasion and Sanding
Once dry, sand every square inch of the trim using a 120-grit to 180-grit sanding sponge. You aren’t trying to strip the wood down to bare fibers; your goal is simply to scratch the existing slick surface to create a microscopic texture (or “tooth”) for the new coating to grip onto mechanically. Vacuum away the debris and wipe the trim completely clean using a lint-free tack cloth.
Step 3: Void Eradication (Caulking and Filling)
Every nail hole must be filled with a high-quality wood filler or spackle and sanded completely flush. Next, run a thin bead of paintable siliconized acrylic caulk along the seam where the trim meets the drywall.
-
Pro-Tip: Use a damp lint-free rag or your finger to smooth the caulk bead into a neat, concave curve. This eliminates the dark, ugly shadow gap between the wood and the wall, making the trim look seamlessly integrated into the architecture.
Step 4: Mastering the “Lay Off” Paint Stroke
When applying the paint, use the pull-and-return method. Load your brush with paint (dipping it only one-third of the way up the bristles) and apply the coating along a two-foot section of the trim.
Once the paint is distributed, perform the “laying off” stroke: start with your brush in the dry, unpainted section, lift it slightly, and lightly drag the brush backward into the wet paint in one continuous, smooth stroke. This unifies the wet edge and minimizes overlapping textures.
Advanced Masking Mastery and the “Wet Peel” Strategy
To get those legendary, razor-sharp paint lines along the wall or floor, your masking tape technique must be precise.
| Masking Step | Action Protocol | Tactical Benefit |
| Placement | Apply tape 1/32″ away from the trim edge onto the wall | Creates a tiny pocket for the paint to seal without bleeding |
| Burnishing | Run a flexible putty knife firmly over the tape edge | Activates the pressure-sensitive adhesive to block leaks |
| Removal | Pull the tape away at a strict 45-degree angle | Slices cleanly through the semi-dry paint film without tearing |
Never let your trim paint dry completely before pulling off your painter’s tape. If the paint fully cures, it forms a cohesive plastic membrane over both the wood and the tape. When you pull the tape away later, it will drag chunks of your beautiful new trim finish right off the wood. Always pull the tape away while the final coat is still slightly tacky to the touch.
Long-Term Maintenance: Preserving the Factory Finish
Once your trim is cured into its hard, enamel shield, maintaining that crisp look is remarkably straightforward. Because you used a high-quality enamel, the surface can handle regular cleaning far better than flat wall paint. Avoid using abrasive scrubbing pads, which can scratch the sheen and leave dull spots. Instead, a simple seasonal wipe-down with a microfiber cloth dampened with warm water and a drop of dish soap is all it takes to remove scuffs and keep your architectural framing looking sharp and pristine.
By upgrading your materials, taking your time through the sanding phases, and executing your final brush strokes with patience, you transform trim work from a tedious chore into the defining crowning achievement of your interior design project.
Did these precision painting techniques change the way you plan to tackle your next room makeover? Are you currently dealing with stubborn brush strokes or trying to match existing sheen levels in your home? Let’s chat in the comments below—share your projects, drop your questions, and let’s master the art of fine finishing together!
