You are kneeling on a hard floor, trying to undercut a stubborn oak door jamb so your new luxury vinyl plank flooring can slide underneath cleanly. You try using a hand saw, but there isn’t enough clearance, and you end up scraping your knuckles against the drywall. Next, you try a hammer and chisel, but the wood splits violently, threatening to ruin a piece of finish trim that will cost a fortune to replace. In a fit of frustration, you realize you are stuck in a mechanical bottleneck.
In my ten-plus years running residential job sites, I’ve watched countless green apprentices and DIYers lose hours of billable time to these exact micro-problems.
The breakthrough moment always happens when I reach into my pack and hand them an oscillating multi-tool fitted with a fresh, application-specific cutter. This tool is the ultimate Swiss Army knife of modern renovation. However, the tool body itself is just a dumb motor; the true magic lies entirely in selecting, calibrating, and managing your oscillating tool blades. Mastering these accessories is how you scale your output from a frustrated amateur to a high-efficiency tradesperson.
The Physics of Oscillation: How These Blades Cut Without a Spin
To the untrained eye, an oscillating tool looks incredibly safe—and it is. Unlike a circular saw that uses high-velocity rotation, or a reciprocating saw that uses a violent back-and-forth sawing motion, an oscillating tool works on a microscopic scale.
The Hummingbird Analogy
Think of the tool like a hummingbird’s wings. Instead of spinning in a full circle, the drive shaft rocks back and forth over a tiny arc—usually just 3.2 to 3.6 degrees—but it does this at an astonishing rate of up to 20,000 oscillations per minute (OPM).
Because the movement is so tight and rapid, it feels more like a high-frequency vibration than a mechanical stroke. This gives you surgical precision. You can plunge the blade directly into a finished wall to cut out a drywall electrical box without damaging the hidden studs or wires resting right behind it—a feat that is physically impossible with almost any other power tool on the planet.
Material Engineering: Bi-Metal vs. Carbide Teeth
When navigating the accessory aisle, you cannot simply buy the prettiest pack of oscillating tool blades. You must look closely at the teeth metallurgy:
-
High-Carbon Steel (HCS): These blades feature soft, flexible teeth optimized exclusively for clean wood, PVC plastics, and soft drywall. If they hit a single hidden framing nail, the teeth will friction-melt instantly, rendering the blade useless.
-
Bi-Metal (Bi-M): Engineered by bonding a high-speed steel tooth strip to a flexible carbon steel backing. These are your true workhorses, capable of chewing through wood embedded with heavy framing nails without breaking a sweat.
-
Carbide-Tipped: The absolute peak of high-versatility mechanical tooling. Carbide teeth can cut through hardened screws, stainless steel plumbing pipes, cement backer board, and dense fiber-cement siding while lasting up to 30 times longer than a standard bi-metal blade.
Strategic Applications: Maximizing Your On-Site Efficiency
Once you understand the technical limits of the metallurgy, you can deploy these blades across multiple phases of a renovation project to eliminate manual labor bottlenecks.
Flawless Plunge Cutting and Pocket Trimming
Need to replace a single damaged floorboard in the middle of a room? A circular saw will over-cut into the neighboring planks. By utilizing a wide wood-cutting blade, you can drop the teeth vertically into the wood grain with zero kickback, carving out a perfect rectangular pocket without disturbing the surrounding structural envelope.
Rapid Grout and Mortar Mitigation
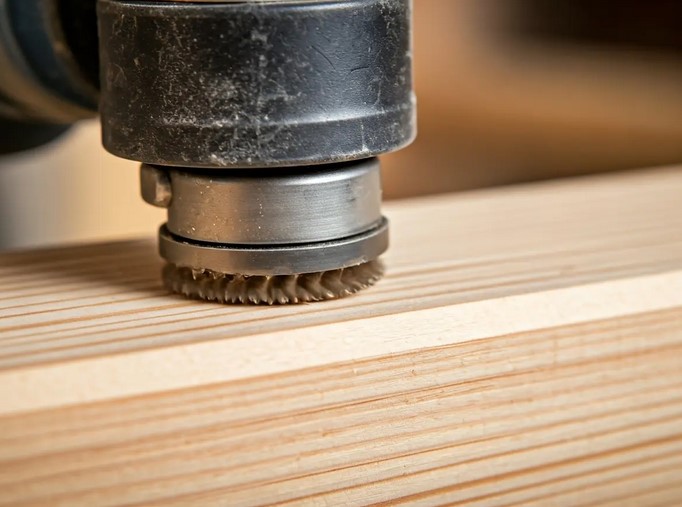
Removing old tile grout with a manual hand scraper is an absolute nightmare for your wrists. Swapping your standard wood blade for a diamond-grit or carbide-grit segment blade transforms your multi-tool into a high-powered concrete eraser. The vibration easily pulverizes cured cementitious grout lines while leaving the delicate glazed ceramic tile edges completely unmarred.
Step-by-Step Optimization: Calibrating for Blade Longevity
The most common mistake beginners make with an oscillating multi-tool is trying to force the blade through the material using brute physical strength. This creates intense localized friction, which destroys the tooth sharpness in seconds. Here is the professional protocol to maximize your cutting logistics.
Expert Advice from the Field
After a decade of burning through thousands of accessories, I’ve uncovered the hidden mechanics that manufacturers don’t print on the retail packaging.
The Silent Bearing Meltdown
When using a carbide-grit blade to remove heavy tile grout or thinset mortar, the tool generates an immense cloud of microscopic, abrasive silica dust. If you hold the tool upside down, gravity will pull that concrete dust straight into the tool’s front oscillating bearing assembly. This will dry out the internal factory grease and seize the motor within weeks. Always use a dust extraction attachment or positioning shield to direct dust away from the tool’s venting slots.
💡 Expert Pro-Tip: The Sacrificial Shingle Guard
When you need to trim off the bottom of a door trim casing right down flush with a subfloor, don’t let the metal blade rub directly against your finished flooring substrate. Slide a thin piece of scrap plastic packaging or an old playing card underneath the blade tip. This acts as a frictionless, sacrificial shield that protects your expensive flooring from unsightly dark burn marks or deep scratches during the final plunge stroke.
Technical Matrix: Matching Blades to Project Logistics
| Blade Configuration | Structural Metallurgy | Target Material Viscosity | Expected Tool Lifespan |
| Japanese-Tooth Profile | High-Carbon Steel (HCS) | Softwood, Hardwood, PVC | Medium (Dulls instantly on metal) |
| Standard Flush-Cut | Bi-Metal (Bi-M) | Wood with framing nails, copper | High (Excellent versatility) |
| Heavy-Duty Plunge | Titanium-Coated Carbide | Stainless steel bolts, rebar, re-keying | Maximum (Extreme wear resistance) |
| Segmented Drop-Rim | Diamond / Carbide Grit | Tile grout, plaster, brick masonry | High (Resists purely abrasive loads) |
Conclusion: Take Control of Your Efficiency
True craftsmanship isn’t about owning fifty different heavy power tools; it is about understanding how to optimize a single, highly versatile mechanical drive system. By investing in premium, application-specific oscillating tool blades, taking time to modulate your motor speeds, and employing a fluid, sweeping cutting motion, you unlock a level of project efficiency that saves hours of physical fatigue.
It is a low-barrier technical upgrade that completely changes the pace of your home improvement projects.
What project are you currently tackling where you feel stuck in a tight corner? Are you still relying on manual hand tools, or are you ready to let high-frequency vibration do the heavy lifting? Drop your toughest cutting challenges or current tool questions in the comments below—let’s get your cutting logistics dialed in perfectly!