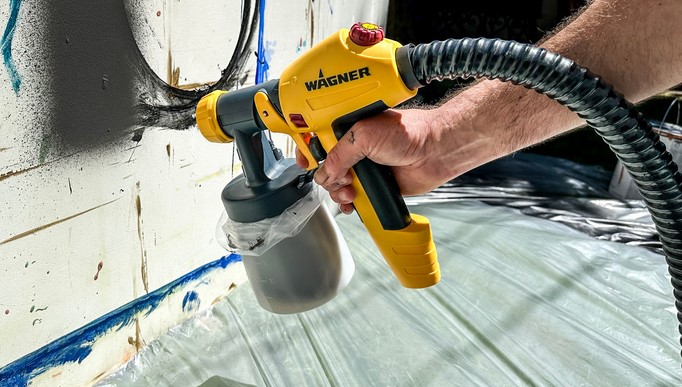
You’ve spent hours meticulously masking off a room, bought a premium $80 can of architectural paint, and rented a high-end airless sprayer to achieve that flawless, glass-like factory finish on your built-in cabinets. You pull the trigger, and instead of a beautiful, atomized mist, your gun violently spits out two heavy, ugly thick lines of paint at the edges of your spray pattern. In the industry, we call these “fingers,” and they are the ultimate hallmark of a botched DIY paint job.
In my over ten years of operating high-pressure coating equipment on commercial and residential sites, I’ve seen this exact heartbreak break the spirits of countless beginners. They usually blame the machine, the pressure setting, or the paint thickness.
Nine times out of ten, however, the culprit is sitting right at the very end of their gun. Choosing, calibrating, and maintaining your paint sprayer tips is the single most critical variable in precision coating engineering. If you get the tip wrong, you are essentially trying to perform surgery with a butter knife. Let’s break down the technical science of these tiny components so you can pull the trigger with total confidence.
The Fluid Dynamics: How Spray Tips Control Your Coating
To master spray finishing, you have to understand that an airless paint sprayer is a beast of pure pressure. The machine forces liquid coating through a microscopically small orifice at forces up to 3,000 PSI.
The Garden Hose Analogy
Think of your spray tip like the thumb you place over the end of a running garden hose. If you leave the opening wide open, water pours out in a heavy, low-velocity stream. If you restrict the opening with your thumb, you force the water to atomize into a fine, pressurized mist.
In the painting world, paint sprayer tips do exactly this, but with mathematical perfection. They dictate two critical factors simultaneously: the fluid flow rate (how much paint passes through the orifice) and the fan width (how wide the spray pattern spreads across the wall).
Cracking the Three-Digit Code
When you look at a professional spray tip (like a Graco or Titan tip), it will have a three-digit number stamped on the vinyl guard—for example, 517 or 311. This isn’t a random part number; it is a highly accurate technical matrix.
-
The First Digit (Fan Width): Multiply this number by 2 to get your total fan width when spraying 12 inches away from the surface. A 517 tip creates a 10-inch fan pattern. A 311 tip creates a 6-inch fan pattern.
-
The Last Two Digits (Orifice Size): This represents the opening size in thousandths of an inch. A 517 tip has a 0.017-inch orifice. A 311 tip has a 0.011-inch orifice.
[Tip Number Breakdown Example: 517]
       5 ───────────► Multiply by 2 ───────────► 10-Inch Fan Width
         17 ────────► Thousandths of an Inch ──► 0.017-Inch Orifice Size
Matching Coatings to Orifice Sizes: A Technical Guide
If you try to spray thick, unthinned exterior latex paint through a tiny 0.011-inch orifice, your gun will clog every three seconds. Conversely, if you try to spray a water-thin polyurethane lacquer through a massive 0.021-inch orifice, the fluid flow will completely overwhelm the surface, causing massive runs and sags.
Thick vs. Thin Material Logistics
As a rule of thumb, matching the material viscosity to the correct orifice size is paramount for proper fluid dynamics:
-
Thin Coatings (Lacquer, Stains, Enamels): Require an orifice range of 0.009 to 0.013 inches. These materials atomize easily under lower pressure and need a restricted flow to prevent flooding.
-
Medium Coatings (Interior Acrylics, Primers, Latex): Require an orifice range of 0.015 to 0.019 inches. This is the sweet spot for standard residential house walls.
-
Heavy Coatings (Heavy Exterior Latex, Block Fillers, Elastomeric): Require an orifice range of 0.021 to 0.035 inches. These materials contain dense solids that require a wide gateway to pass through smoothly.
Step-by-Step Calibration: Getting a Flawless Pattern
Before you begin coating your actual substrate, you must perform a pressure calibration test on a large piece of scrap cardboard. This protocol ensures your paint sprayer tips are performing optimally.
Expert Advice from the Field
After blasting thousands of gallons of paint throughout my career, I’ve uncovered the hidden financial traps that catch intermediate painters off guard.
The Silent Cost of Tip Wear
Paint sprayer tips do not last forever. In fact, think of paint like liquid sandpaper; as it passes through the tungsten carbide core under extreme pressure, it slowly erodes the orifice. A worn-out tip shifts its geometry—the orifice gets larger and the fan width shrinks. If a 517 tip wears down to a 319 pattern, you will use 30% more paint to cover the exact same surface area, resulting in heavy pooling, uneven drying, and wasted money. Replace your tips after every 50 to 100 gallons of standard latex use.
💡 Expert Pro-Tip: The “Reverse-and-Clear” Protocol
If your gun suddenly stops spraying mid-stroke, do not take the tip assembly apart while the machine is under pressure—this poses a severe high-pressure injection hazard to your hands. Instead, simply engage the gun safety, rotate the arrow-shaped reversible tip handle exactly 180 degrees to the “clean” position, point the gun into a waste bucket, and pull the trigger once. The internal pressure will back-flush the clog instantly. Flip the tip back to the spray position, and you are back in business within five seconds!
Equipment Selection Matrix: Choosing Your Tip Category
| Project Substrate | Ideal Material | Recommended Tip Code | Expected Finish Style |
| Cabinetry & Trim | Solvent-Based Lacquer / Waterborne Alkyd | 311 or 411 (Fine Finish) | Ultra-Smooth, Factory Quality |
| Interior Drywall | Standard Acrylic Latex Interior Paint | 515 or 517 | Rapid Coverage, Soft Tapered Edges |
| Exterior Siding | Heavy Acrylic Exterior Coating | 519 or 619 | Thick Barrier Layer, Wide Pattern |
| Wooden Fences & Decks | Low-Viscosity Penetrating Oil Stain | 413 or 513 | Deep Penetration, Minimal Over-Spray |
Conclusion: Mastering the Edge of Your Finish
Achieving a high-end, professional architectural coating isn’t about moving your arm as fast as you can; it’s about managing fluid dynamics through the strategic application of your hardware. By selecting the correct paint sprayer tips for your specific material viscosity, checking for pattern wear regularly, and calibrating your system pressure systematically, you remove the guesswork from spraying. You’ll save money on wasted paint and elevate your craftsmanship to a truly commercial level.
Are you getting ready to rent a sprayer for an upcoming home makeover? What kind of material are you planning to run through your machine? Drop your project details or troubleshooting questions in the comments below—let’s make sure you get a glass-smooth finish!