Imagine baking a loaf of artisanal sourdough bread for a weekend dinner party. You meticulously scoop out your flour using standard measuring cups, level the top with a knife, mix your dough, and let it proof. A few hours later, you pull a dense, gummy brick out of the oven instead of a light, airy masterpiece. You double-checked the recipe, so what went wrong?
In my over ten years of remodeling high-end kitchens and collaborating with professional chefs on culinary spatial design, I’ve seen this exact heartbreak happen to incredibly passionate home cooks. The culprit isn’t your baking talent or your oven temperature; it’s the inherent flaw of volumetric measurement.
A single cup of all-purpose flour can weigh anywhere from 120 grams to 160 grams depending on how tightly packed it is into that plastic measuring cup. That is a massive 33% variance in your dry ingredients!
When you shift from volume to mass, your culinary output scales up dramatically. Integrating a high-quality kitchen scale digital unit into your daily prep routine is the single cheapest, highest-impact upgrade you can make for your culinary workflow. Let’s dive deep into the precision engineering of these small devices and explore how to unlock flawless accuracy in your kitchen.
The Engineering of Precision: How Digital Sensors Beat Volumetric Cups
To understand why a electronic sensor leaves plastic measuring spoons in the dust, we have to look at the underlying material science.
The Strain Gauge Principle
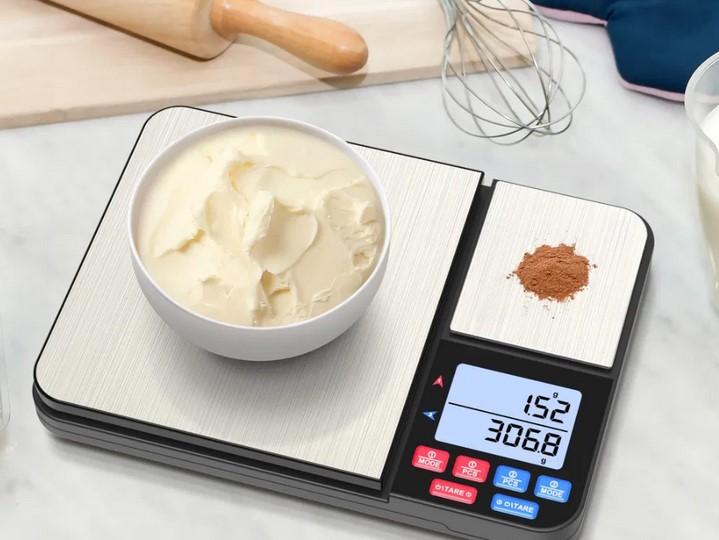
Inside a modern kitchen scale digital platform sits a tiny, highly calibrated piece of metal called a load cell, which is paired with an electronic element known as a strain gauge.
Think of it like a micro-structural diving board. When you place an ingredient (like a handful of chocolate chips) onto the glass or stainless steel platform, the weight causes the internal metal bar to bend downward by a microscopic fraction of a millimeter. This tiny structural deformation changes the electrical resistance running through the circuit. The scale’s internal microprocessor instantly translates that electrical variance into a hyper-accurate numerical readout on your LCD screen.
The Flour and Feather Analogy
Volume measures how much space an object occupies, whereas mass measures how much actual matter is there. Think about a cup of feathers versus a cup of lead pellets. They occupy the exact same volumetric space, but their physical mass is completely different.
Flour behaves exactly like feathers; air pockets get trapped between the milled grains when you scoop it out of a bag. A digital sensor cuts right through this atmospheric layout, registering the absolute weight down to a decimal point, ensuring your ingredient ratios are perfectly balanced every single time.
Technical Specifications: Anatomy of a High-Performance Digital Scale
When you are navigating the small appliance market, you shouldn’t just buy the device that matches your countertop finish. You need to look closely at the technical data sheet for these core parameters:
-
Resolution and Increments: For standard baking and meal prep, look for a scale that measures in 1-gram or 0.05-ounce increments. If you frequently mix molecular gastronomy ingredients, cure meats, or brew specialty pour-over coffee, opt for a micro-scale that resolves down to 0.1 grams.
-
Max Capacity Threshold: A professional-grade unit should have a structural capacity of at least 11 pounds (5 kilograms). This ensures you can place a heavy ceramic mixing bowl onto the platform without overloading the delicate internal strain gauge.
-
Auto-Off Timeout Buffer: There is nothing more frustrating than stepping away to grab an ingredient, only for your scale to shut off automatically mid-measurement, erasing your progress. Look for a unit with a minimum 2-to-3-minute auto-off buffer, or a model that allows you to disable the auto-shutoff completely.
Step-by-Step Calibration: Getting Flawless Culinary Readouts
Operating a digital scale isn’t just about throwing food onto the glass platform. To ensure complete consistency across your culinary assets, you must follow a proper sequencing protocol.
Step 1: Establishing the Mechanical Zero (The Tare Function)
The tare button is the most powerful feature on your device, allowing you to subtract the weight of your containers automatically.
-
Place your empty mixing bowl or container directly onto the center of the scale platform.
-
Press the Tare (or Zero) button once.
-
The LCD display will instantly drop back down to 0.0 grams, completely ignoring the heavy glass or steel bowl.
Step 2: Multi-Ingredient Compounding Logistics
Instead of washing five different bowls, you can build your entire recipe inside a single container using sequential taring.
[Compounding Assembly Workflow]
Place Empty Bowl ──► Press Tare (Reads 0g)
       ↓
Add Flour (Target 300g Achieved) ──► Press Tare (Resets to 0g)
       ↓
Add Sugar (Target 50g Achieved) ──► Press Tare (Resets to 0g)
       ↓
Add Butter (Target 100g Achieved) ──► Total Batch Complete
This streamlined logistics chain saves you immense cleanup time and keeps your kitchen counters entirely clutter-free.
Hidden Warnings and Professional Expert Advice
Over my years of designing kitchens and auditing workflow systems, I’ve uncovered a few hidden variables that can silently throw off your scale’s accuracy.
The Surface Level and Air Draft Trap
Digital load cells are incredibly sensitive to external kinetic forces. If you place your kitchen scale digital unit on a slightly warped cutting board, a grout line on a tile countertop, or right next to a running stovetop exhaust hood, the vibration and uneven surface will warp the reading. Always operate your scale on a perfectly flat, solid stone or quartz surface, away from active air currents.
💡 Expert Pro-Tip: The Battery Depletion Deviation
When the lithium or AAA batteries inside a digital scale start to lose their charge, the voltage supplied to the strain gauge drops. This doesn’t just make the LCD screen dim—it actually causes the microchip to report inaccurate weights, often drifting upward or downward by several grams mid-mix. If you notice your scale taking a long time to settle on a number, swap the batteries immediately to preserve your measurement integrity.
Technical Comparison: Volumetric vs. Digital Mass Measurement
| Recipe Variable | Traditional Measuring Cups | Kitchen Scale Digital |
| Measurement Precision | Low (Varies based on packing density) | Hyper-Accurate (Within 0.1 to 1.0 grams) |
| Cleanup Logistics | High (Multiple nested cups to wash) | Minimal (One bowl used via Tare function) |
| Unit Conversion Versatility | Poor (Requires manual math charts) | Instant (Toggle between grams, ounces, ml, lbs) |
| Storage Footprint | Bulky, takes up drawer space | Ultra-slim, slips easily into a cabinet slot |
| User Learning Curve | High (Requires specific scooping style) | Zero (Drop material until number matches) |
Conclusion: Upgrade Your Culinary Precision Today
True improvement in the home isn’t just about updating your structural framing or installing flashy light fixtures; it’s about introducing precision tools that elevate your daily lifestyle. Upgrading to a high-quality kitchen scale digital system removes the chaotic guessing game from your cooking and baking. It bridges the gap between frustration and absolute consistency, giving you the exact data you need to execute flawless recipes every single time you pull out an apron.
Are you still measuring your dry ingredients with plastic cups, or are you ready to bring high-precision engineering onto your countertops? What is the trickiest recipe you’ve struggled to get consistent results with? Let me know your current kitchen challenges or drop your gadget questions in the comments below—let’s get your measurements perfectly dialed in!