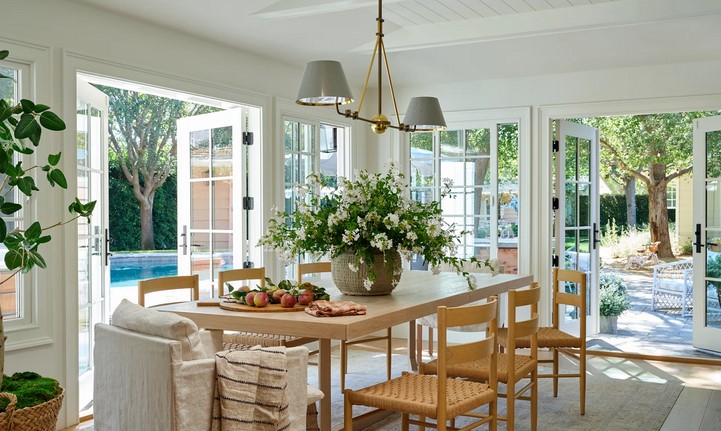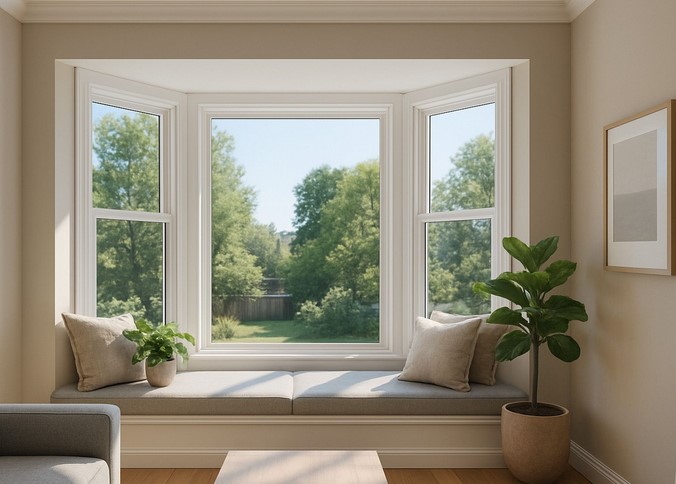
Every year, thousands of homeowners invest in sprawling floor plans, chasing the dream of more space. Yet, when I step into their homes for a structural consultation, I often find a strange paradox: large, beautiful rooms with dead, unutilized zones. The biggest offender is almost always that gorgeous, three-sided glass bump-out in the living room or master suite. It sits there, flooding the room with natural light, but completely isolated from the daily flow of the house—usually occupied by a lonely, dusty armchair or a dying houseplant.
In my over ten years as a home renovation contractor, I’ve realized that good design isn’t about adding square footage; it’s about engineering efficiency into the space you already have.
Transforming an underutilized architectural protrusion into a custom bay window seat is one of the highest-return structural upgrades you can make. It creates a cozy, high-value destination that bridges the gap between raw outdoor light and functional indoor comfort, turning a passive design feature into an active social hub.
The Spatial Math: Unlocking Dead Real Estate
To understand why this specific built-in configuration adds so much value, we have to look at how furniture interacts with a room’s footprint.
Breaking the “Floating Furniture” Bottleneck
When you place a standard freestanding sofa or chair in front of an angled window alcove, you are forced to leave a gap behind it. This creates a zone of “dead volume” that is completely inaccessible for cleaning and serves no functional purpose.
A custom-engineered bay window seat operates like a tailor-made suit for your home’s architecture. By framing a continuous bench seat directly into the contours of the bay, you reclaim that lost floor space.
Think of it like a built-in vehicle cabin seat. It compresses your seating footprint flush against the home’s exterior envelope, completely clearing up the main traffic lanes of your room while expanding your overall seating capacity by three to four adults.
The Thermal Performance Factor
Because you are building an structural platform directly against multiple sheets of glass, you must understand the micro-climate of a bay window.
Standard double-hung or picture windows within a bay configuration are subject to intense solar heat gain in the summer and radiant heat loss during the winter. A properly engineered bench acts as a structural buffer, helping to stabilize room comfort by sealing off a portion of the lower wall assembly where drafts frequently sneak through.
Technical Dimensions: The Ergonomics of a Perfect Bench
The difference between a built-in bench that family members fight over and one that sits empty comes down to fractions of an inch. If your platform is too high, your legs will dangle uncomfortably; if it is too deep, you will find yourself slouching against the glass.
Standard Anthropometric Guidelines
Through a decade of trial and error on custom finish carpentry projects, I have developed a non-negotiable measurement matrix for framing out a bay window seat:
-
Finished Seat Height: Your platform should sit precisely 18 inches above the finished floor line. Keep in mind that if you plan on using a luxurious 3-inch high-density foam cushion, your rough wooden framing platform must be built at exactly 15 inches high.
-
Optimal Bench Depth: The sweet spot for a standard sitting bench is between 18 to 22 inches deep. If you want to configure the nook as a daybed or a cozy reading lounge where you can tuck your legs up, you must scale the depth up to at least 28 to 32 inches.
-
The Window Sill Clearance: Ensure the top surface of your cushion sits at least 2 to 3 inches below the lower window sash. If the cushion presses directly against the wood trim or glass frame, it will trap moisture condensation, leading to paint peeling and localized wood rot.
Step-by-Step Framing Guide: Crafting a Structural Masterpiece
If you are a mid-level DIYer looking to tackle this project over a long weekend, structural integrity must take precedence over aesthetics. Here is the sequential construction protocol my team follows on the job site.
Professional Field Advice
After a decade of auditing and remodeling residential interiors, I have seen a few critical design errors that can turn a beautiful nook project into a structural headache.
The Vent Blockage Trap
In many traditional home layouts, architects place a central HVAC floor register or wall vent directly beneath a bay window to counteract winter drafts. A common rookie mistake is framing a solid bay window seat right over the top of this vent, completely choking the room’s air circulation. You must extend the ductwork! Install a toe-kick duct evaporator kit to reroute the air cleanly out through the front base of your new bench, keeping your heating system efficient and your toes warm.
💡 Expert Pro-Tip: The Outswing Window Cleat
If your bay alcove features crank-out casement windows or awning windows, check the hardware clearance before fastening your bench down. Ensure the crank handles have a full, unobstructed 360-degree rotation path after your thick seat cushion is in place. If space is tight, swap out the standard large folding handles for low-profile, sleek “tee-handles” to prevent your cushions from scraping against the metal hardware.
Value Engineering Matrix: Storage Modality Analysis
| Architectural Metric | Lift-Top Hinge Storage | Full-Extension Front Drawers | Open Cubby Shelving |
| Construction Complexity | Low (Great for beginners) | High (Requires precision joinery) | Moderate |
| Storage Accessibility | Moderate (Must remove cushions to open) | High (Slides out effortlessly) | Maximum (Instant access) |
| Visual Aesthetics | Clean, completely seamless face | High-end, custom cabinetry look | Casual, relaxed cottage vibe |
| Material Costs | Minimal (Standard hinges) | High (Heavy-duty slide tracks) | Moderate |
| Best Applied For | Seasonal blankets, winter gear | Daily items, kids’ toys, games | Books, decorative storage bins |
Conclusion: Elevate Your Home’s Architectural Narrative
True home improvement isn’t about chasing fleeting interior design fads; it’s about looking at your existing structural footprint and extracting its maximum functional potential. By engineering a custom bay window seat, you transform an overlooked architectural niche into a premium asset. It streamlines room traffic, introduces massive hidden storage reserves, and provides a beautiful, sun-drenched sanctuary for your morning coffee or afternoon reading.
It is an immensely rewarding project that fundamentally upgrades how you live in and experience your home.
What does the bay window area in your home look like right now? Are you dealing with awkward angles, or do you have a heating vent that you’ve been unsure how to redirect? Drop your dimensions or design dilemmas in the comments below—let’s map out your ultimate window transformation together!