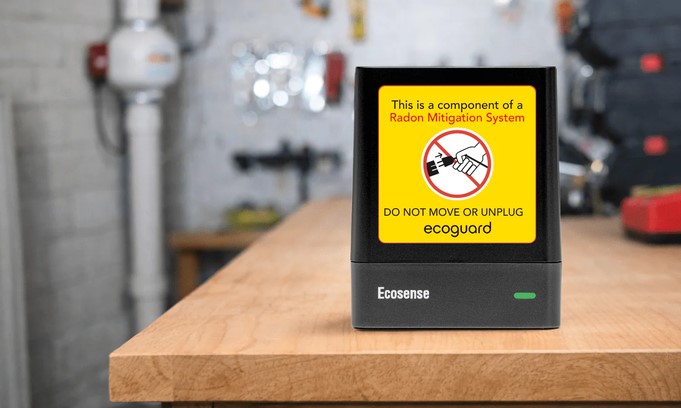
A few years ago, I was inspecting a beautifully finished walk-out basement for a family who spent nearly all their free time there. It had a home theater, a playroom for the kids, and a spotless concrete floor. To the naked eye, it was the perfect living space. But when I plugged in a specialized testing device, the readings made my stomach drop. The invisible, odorless gas pooling in that lower level was at a concentration equivalent to smoking nearly half a pack of cigarettes a day inside their own home.
In the home improvement and inspection industry, we deal with plenty of visible problems like roof leaks and rotting deck joists. But radon gas is a completely silent hazard. According to the EPA and public health data, radon is the leading cause of lung cancer among non-smokers, claiming roughly 21,000 lives each year in the US alone. It doesn’t matter if your house is brand new or a century old; radioactive gas can seep through microscopic foundations cracks unnoticed.
For decades, homeowners relied on charcoal test kits that you had to mail to a lab, providing only a vague, retrospective snapshot. Today, the game has fundamentally changed. Deploying a continuous smart radon monitor allows you to track air safety dynamically, transforming a hidden threat into manageable, real-time data.
The Subterranean Threat: Understanding Pressure Differentials and Radon Alpha Decay
To understand why radon gas accumulates inside a home, imagine your house as a giant drinking straw stuck into the earth. Because of a property called the stack effect, warm air inside your home naturally rises and escapes through upper-level vents and windows. This upward movement creates a low-pressure zone in your basement or crawlspace, which effectively vacuums up gases out of the soil underneath your foundation.
Radon is a byproduct of the natural radioactive decay of uranium found in soil and rocks. As it breaks down, it releases alpha particles. If inhaled over long periods, these high-energy particles damage lung tissue at a cellular level.
Because soil moisture, barometric pressure, and seasonal temperature swings constantly alter how much gas enters your home, a single short-term test is highly unreliable. A smart radon monitor solves this problem by using a digital ionization chamber to sample the air continuously, providing a rolling average that catches spikes before they become dangerous.
Technical Architecture: What Makes a Radon Monitor “Smart”?
When looking to integrate an environmental tracking tool into your home ecosystem, it helps to look beyond basic aesthetics. The internal hardware determines how accurately you can map your indoor air quality.
Pulsed Ionization Chambers vs. Solid-State Sensors
-
Pulsed Ionization Chambers: This is the gold standard for residential smart monitors. They work by allowing air to diffuse into a small chamber where electrical pulses count the alpha particles as they decay. This technology delivers highly accurate readings within 24 hours of placement.
-
Photodiode Sensors: Often found in ultra-compact budget options, these rely on light-sensitive chips to detect radiation events. While functional, they generally require much longer sampling windows to provide a statistically stable reading.
Ecosystem Integration and Data Logging
A truly smart device does more than show numbers on a screen; it connects to your home network via Wi-Fi or Bluetooth. This connection allows the device to compile long-term datasets, map trends across seasons, and send push alerts to your smartphone if your levels cross the action threshold of 4.0 pCi/L (picocuries per liter) or 148 Bq/m³ (becquerels per cubic meter).
Step-by-Step Deployment: Calibrating for True Environmental Accuracy
An advanced monitoring tool is only as reliable as its placement strategy. Tossing a high-tech sensor onto a random shelf next to a drafty window will completely skew your data.
                  [ SMART MONITOR PLACEMENT MAP ]
   +------------------------------------------------------------+
   |                                                            |
   |   [X] WRONG: Too Close to Window/Drafts                    |
   |                                                            |
   |                  +---------------------+                   |
   |                  |  [O] IDEAL ZONE     |                   |
   |                  |  Breathing Height   |                   |
   |                  |  2-6 Feet Off Floor |                   |
   |                  +---------------------+                   |
   |                                                            |
   |   [X] WRONG: Directly on Bare Concrete Floor               |
   +------------------------------------------------------------+
Step 1: Target the Lowest Inhabited Level
Always place your monitor in the lowest occupied level of the home, such as a spent basement, a lower-level bedroom, or a family room. If you only use your basement for rough storage, place the monitor on the first floor where your family spends the most consecutive hours.
Step 2: Maintain Structural Offsets
Radon enters from the earth below and from the walls touching the soil. To get a true reading of the air you actually breathe, position your smart radon monitor according to these strict parameters:
-
At least 3 feet away from exterior walls and windows.
-
At least 2 to 6 feet off the ground (on a table, desk, or shelf).
-
Far away from high-humidity zones like laundry machines, showers, or sump pumps, as excessive moisture can interfere with the internal ionization calculations.
Step 3: Establish the Initial Calibration Window
Once you power up the device, leave it completely undisturbed for at least 7 days. Avoid opening nearby exterior doors or windows frequently during this period. The smart algorithms need time to adjust to your home’s baseline atmospheric conditions and eliminate short-term statistical noise.
Interpreting the Data and Executing Mitigation Strategies
Once your data begins streaming to your dashboard, you need to know how to interpret the fluctuations and when to take physical action in your home.
| Reading Range | Hazard Classification | Required Action Plan |
| 0.0 – 1.9 pCi/L | Safe Baseline | No action required. Continue seasonal tracking. |
| 2.0 – 3.9 pCi/L | Moderate Risk | Increase natural ventilation. Seal visible foundation cracks with polyurethane caulk. |
| 4.0 pCi/L and Above | Action Threshold | Long-term exposure requires professional active soil depressurization (ASD). |
Do not panic over temporary radon spikes that last for a few hours. When barometric pressure drops rapidly—such as during a heavy rainstorm or winter blizzard—the earth acts like a squeezed sponge, pushing a temporary surge of soil gas into your basement. Look at your 7-day and 30-day rolling averages on your smart app to make informed safety decisions rather than reacting to short-term anomalies.
Advanced Home Integration: Automating Your Mitigation Response
The ultimate power of a smart environmental setup comes from home automation. If your monitor detects levels creeping upward into the moderate risk zone, you don’t have to wait until it reaches a dangerous threshold to act.
Using platforms like Home Assistant, IFTTT, or Apple Home, you can program your smart radon monitor to trigger your home’s mechanical systems automatically. For instance, when a 24-hour average hits 3.0 pCi/L, the monitor can command your HRV/ERV (Heat Recovery Ventilator) to ramp up its air exchange rate, pulling fresh air into the lower levels and safely flushing out the stagnant soil gases.
Investing in a continuous digital monitoring strategy provides permanent peace of mind that a simple mail-in cardboard kit can never match. It gives you absolute control over your indoor air quality, ensuring that the spaces your family loves most remain safe, healthy, and pristine.
Have you ever tested your home for radon, or are you curious about how your local geology might impact your indoor air quality? What smart devices do you currently use to keep your home healthy? Let us know in the comments below, and let’s discuss your home environmental projects!
